Model 2
Model2 구조는 MVC 패턴을 웹개발에 도입한 구조이다.
클라이언트 요청에 대한 처리는 Servlet이, logic 처리는 java class(Service, DAO,...)가, 클라이언트에게 출력하는 response page는 JSP가 담당한다.
| Model2 | MVC 패턴 | 설명 |
| Service, DAO, Java Beans | Model | Logic 처리 Controller로부터 넘어온 데이터를 이용하여 수행하고, 그에 대한 결과를 다시 Controller로 리턴한다. |
| JSP | View | 모든 화면 처리 담당 클라이언트 요청에 대한 결과뿐 아니라 controller에 요청을 보내는 화면단도 jsp에서 처리한다. |
| Servlet | Controller | 클라이언트 요청을 분석하여 Logic 처리를 위한 Model 호출 필요에 따라 request, session 등에 결과 데이터를 저장하고, redirect 또는 forward 방식으로 jsp(view) page를 이용하여 출력한다. |

장점
- view 코드와 로직처리 코드가 분리되어 있어 JSP는 Model1에 비해 복잡하지 않다.
- Back-End와 Front-End가 분리되어 분업이 용이하다.
- 기능에 따라 코드가 분리되었기 때문에 유지보수가 쉽다.
- 확장성이 뛰어나다.
단점
- 구조가 복잡하여 초기진입이 어렵다.
- 개발시간의 증가로 개발 비용이 증가한다.
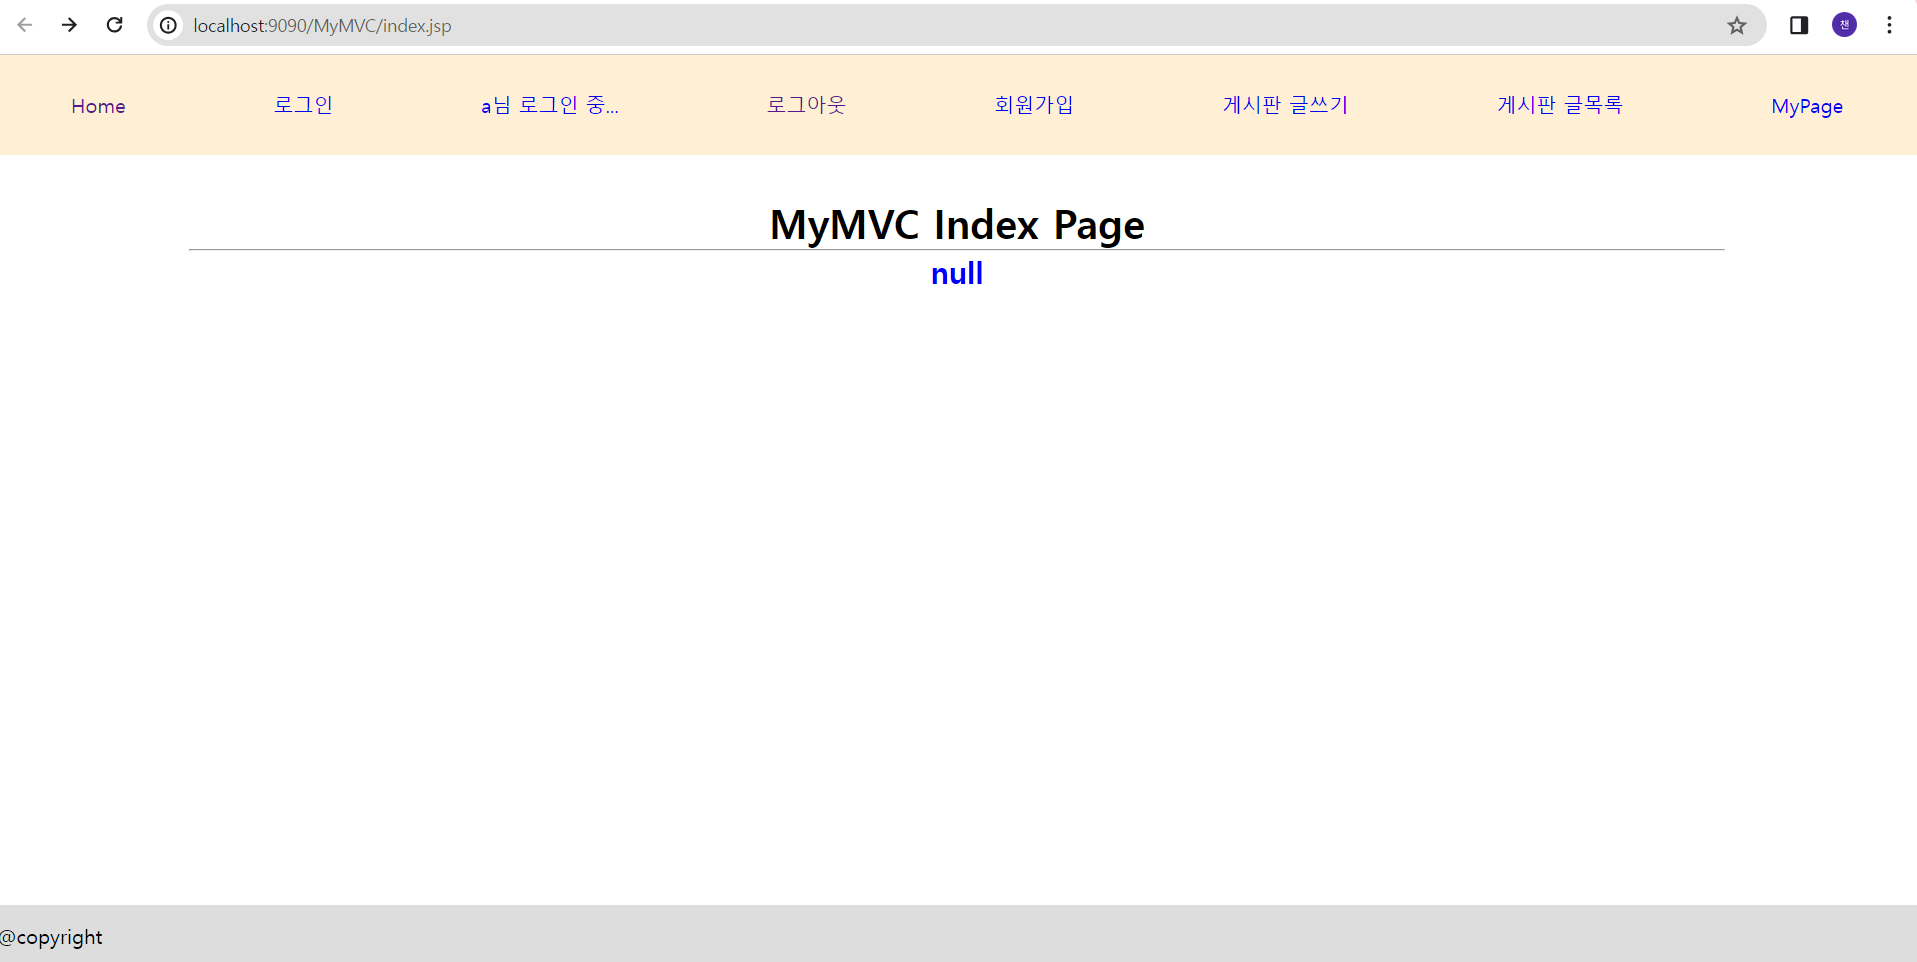
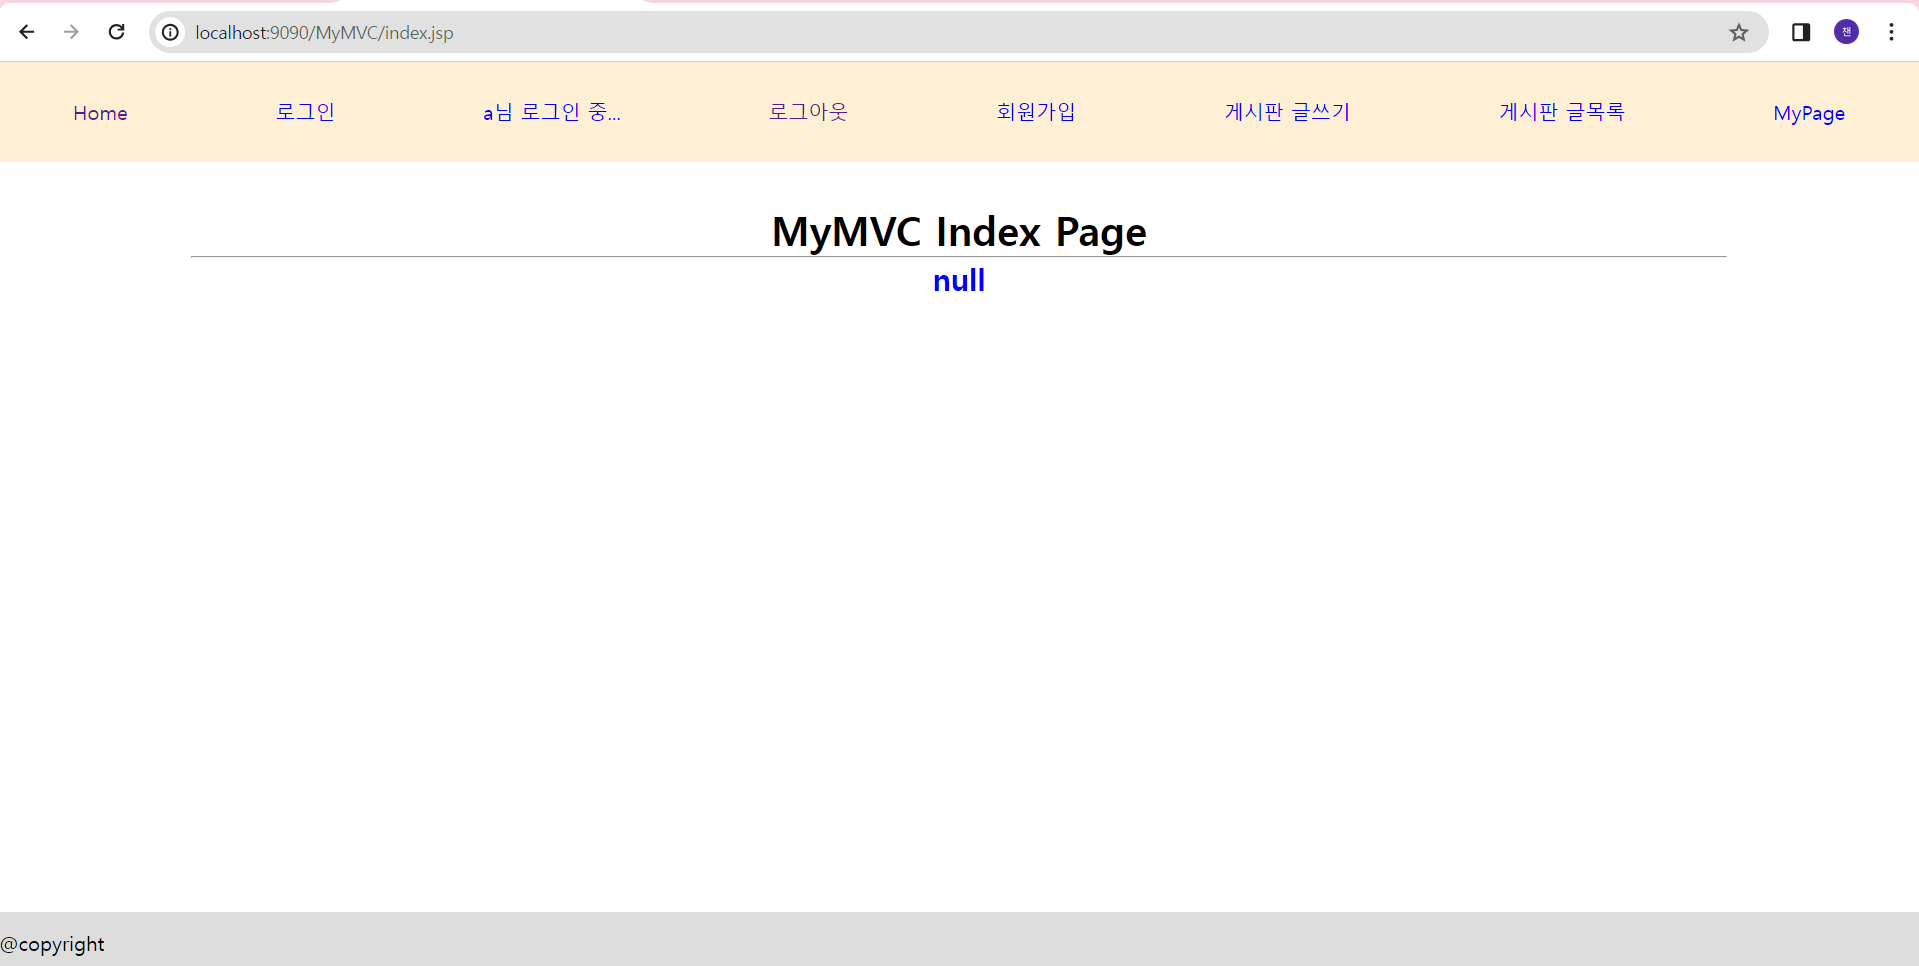
메인 페이지(웰컴 페이지) 만들기
상단
[경로: MyMVC/src/main/webapp/inc/top.jsp]
|
1
2
3
4
5
6
7
8
9
10
11
12
13
14
15
16
17
18
19
20
21
22
23
24
25
26
27
28
|
<%@ page language="java" contentType="text/html; charset=UTF-8"
pageEncoding="UTF-8"%>
<%
//컨텍스트명 구하기
String ctx = request.getContextPath(); //"/MyMVC" 반환
%>
<!DOCTYPE html>
<html>
<head>
<meta charset="UTF-8">
<title>MyWeb</title>
<link rel="stylesheet" type="text/css" href="<%=ctx %>/css/style.css">
</head>
<body>
<div class="wrap">
<header>
<!-- top menu: 수정 -->
<ul class="topMenu">
<li><a href="<%=ctx %>/index.jsp">Home</a></li>
<li><a href="<%=ctx %>/login/login.do">로그인</a></li>
<li><a href="#">a님 로그인 중...</a></li>
<li><a href="<%=ctx %>/login/logout.do">로그아웃</a></li>
<li><a href="<%=ctx %>/member/join.do">회원가입</a></li>
<li><a href="<%=ctx %>/board/input.do">게시판 글쓰기</a></li>
<li><a href="<%=ctx %>/board/list2.do">게시판 글목록</a></li>
<li><a href="<%=ctx %>/login/mypage.do">MyPage</a></li>
</ul>
</header>
|
cs |
본문
[경로: MyMVC/src/main/webapp/index.jsp]
|
1
2
3
4
5
6
7
8
9
10
11
|
<%@page import="javax.print.attribute.HashPrintRequestAttributeSet"%>
<%@ page language="java" contentType="text/html; charset=UTF-8"
pageEncoding="UTF-8"%>
<div class="container">
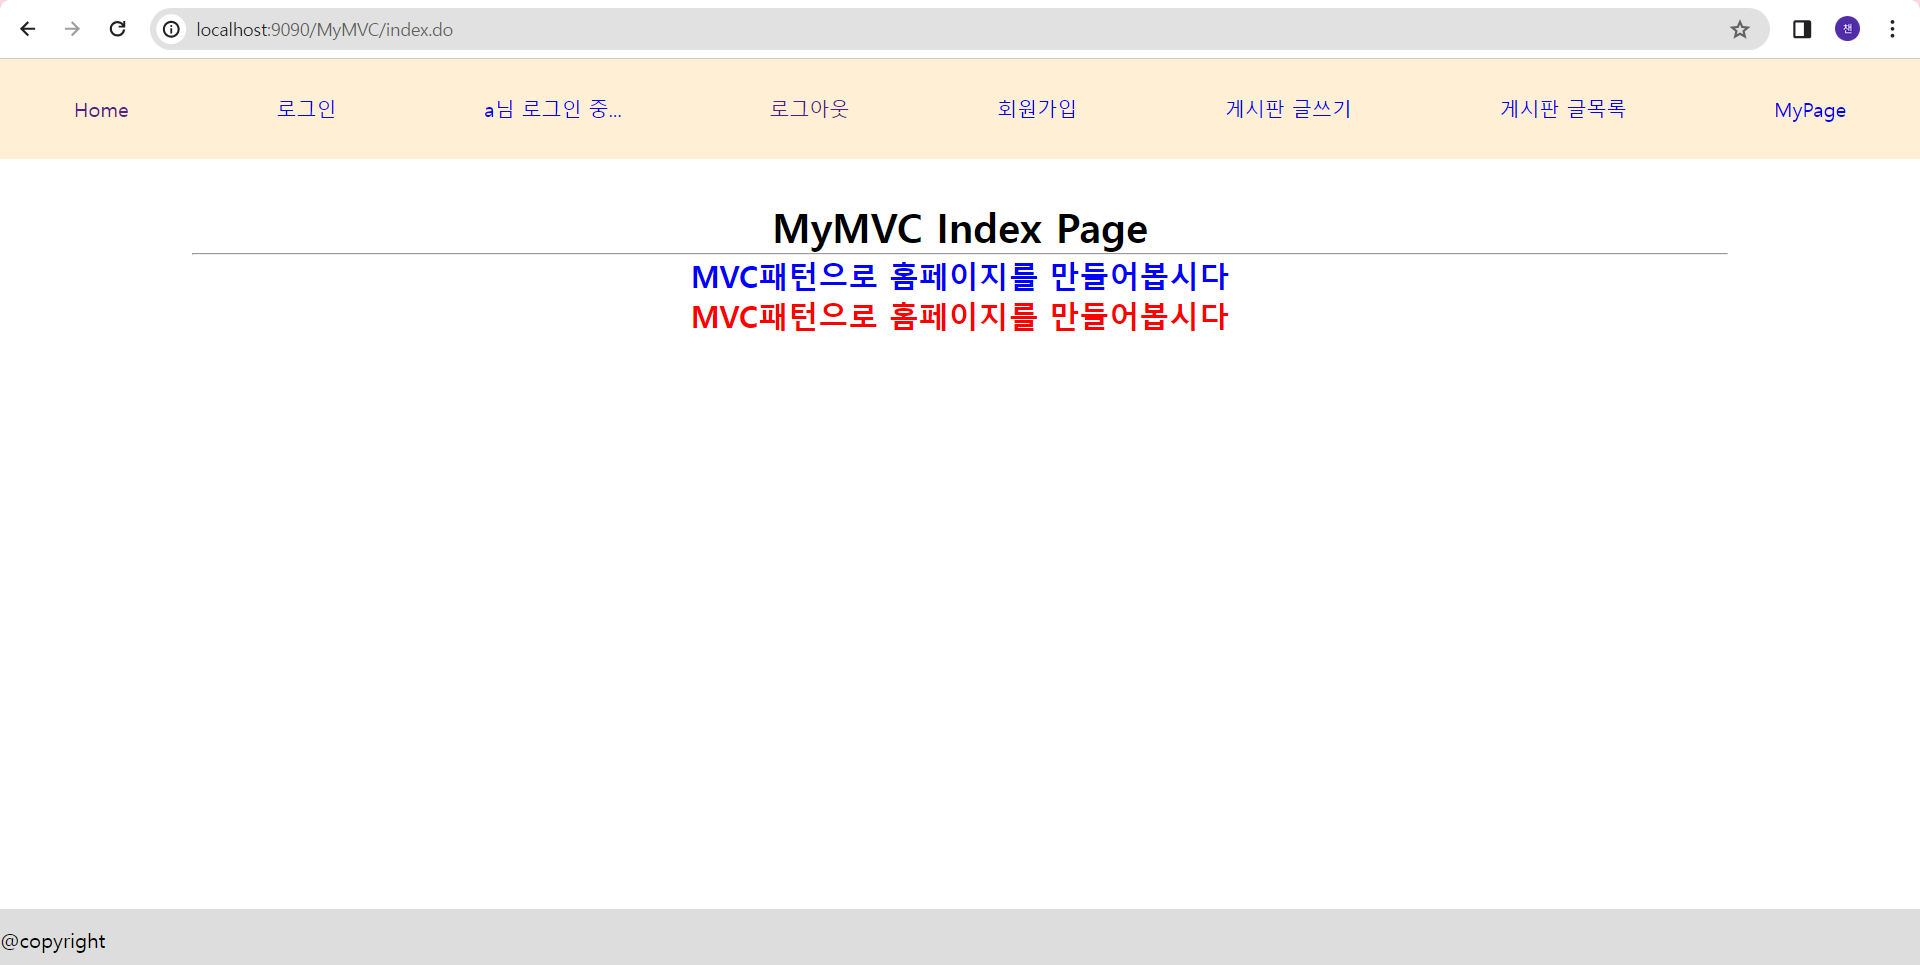
<h1>MyMVC Index Page</h1>
<hr>
<h2 style='color:blue'><%=request.getAttribute("msg") %></h2>
<%-- el expression
${key} ==> key에 해당하는 value값을 출력한다. --%>
<h2 style='color:red'>${msg}</h2>
</div>
|
cs |
하단
[경로: MyMVC/src/main/webapp/inc/foot.jsp]
|
1
2
3
4
5
6
7
8
9
10
|
<%@ page language="java" contentType="text/html; charset=UTF-8"
pageEncoding="UTF-8"%>
<!-- footer -->
<footer class="footer">
@copyright
</footer>
</div>
<!-- .wrap end -->
</body>
</html>
|
cs |
web.xml
- 웰컴 페이지 설정: index.jsp를 최상단으로 설정(웰컴 페이지 최우선순위)
- 모든 jsp 사이트에 대해서 상하단에 top.jsp와 foot.jsp를 include하기
|
1
2
3
4
5
6
7
8
9
10
11
12
13
14
15
16
17
18
19
20
21
|
<?xml version="1.0" encoding="UTF-8"?>
<web-app xmlns:xsi="http://www.w3.org/2001/XMLSchema-instance" xmlns="http://xmlns.jcp.org/xml/ns/javaee" xsi:schemaLocation="http://xmlns.jcp.org/xml/ns/javaee http://xmlns.jcp.org/xml/ns/javaee/web-app_4_0.xsd" id="WebApp_ID" version="4.0">
<display-name>MyMVC</display-name>
<welcome-file-list>
<welcome-file>index.jsp</welcome-file>
<welcome-file>index.html</welcome-file>
<welcome-file>index.htm</welcome-file>
<welcome-file>default.html</welcome-file>
<welcome-file>default.jsp</welcome-file>
<welcome-file>default.htm</welcome-file>
</welcome-file-list>
<!-- include jsp =============================== -->
<jsp-config>
<jsp-property-group>
<url-pattern>*.jsp</url-pattern>
<include-prelude>/inc/top.jsp</include-prelude>
<include-coda>/inc/foot.jsp</include-coda>
</jsp-property-group>
</jsp-config>
<!-- =========================================== -->
</web-app>
|
cs |
MVC 패턴 - JSP에서 MVC 패턴을 구현하는 방법
- 서비스하는 기능마다 서블릿을 정의하고 등록
요청마다 서블릿을 만들고 매핑되는 URL패턴을 설정 - Front Controller를 만들어 모든 요청을 받는 서블릿을 정의하고 등록
- URL매핑에 /를 이용하여 하나의 서블릿이 모든 요청을 받음
- 요청 URL 또는 파라미터로 전달된 명령을 이용하여 처리할 비즈니스 로직을 선택
- FrontController에서 요청을 분석하고 비즈니스 로직 처리 후 브라우저에 응답 또는 적절한 뷰를 선택하여 응답
Front Controller 디자인 패턴
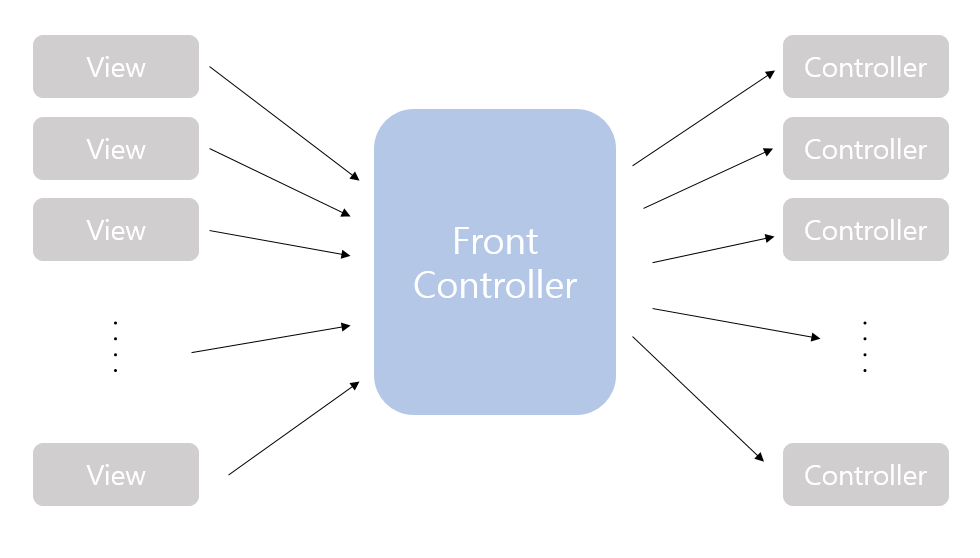
Front Controller
- 대표 컨트롤러
- 서브 컨트롤러들을 통제하는 장군 같은 역할
Sub Controller (XXXAction)
- 프론트 컨트롤러 다음에 실제 서비스를 처리하는 컨트롤러
- view → Front Controller → Sub Controller
| key | value |
| memberInsert.do | memberInsert |
| memberSearch.do | memberSearch |
| memberUpdate.do | memberUpdate |
프론트 컨트롤러는 어떤 요청에 대하여 어떠한 서브 컨트롤러가 실행되어야 하는지에 대한 정보를 알고 있어야 한다. 이러한 정보는 위 테이블과 같이 주로 map 객체에 저장하며, 저장된 정보에서 서브 컨트롤러를 찾아서 실행한다.
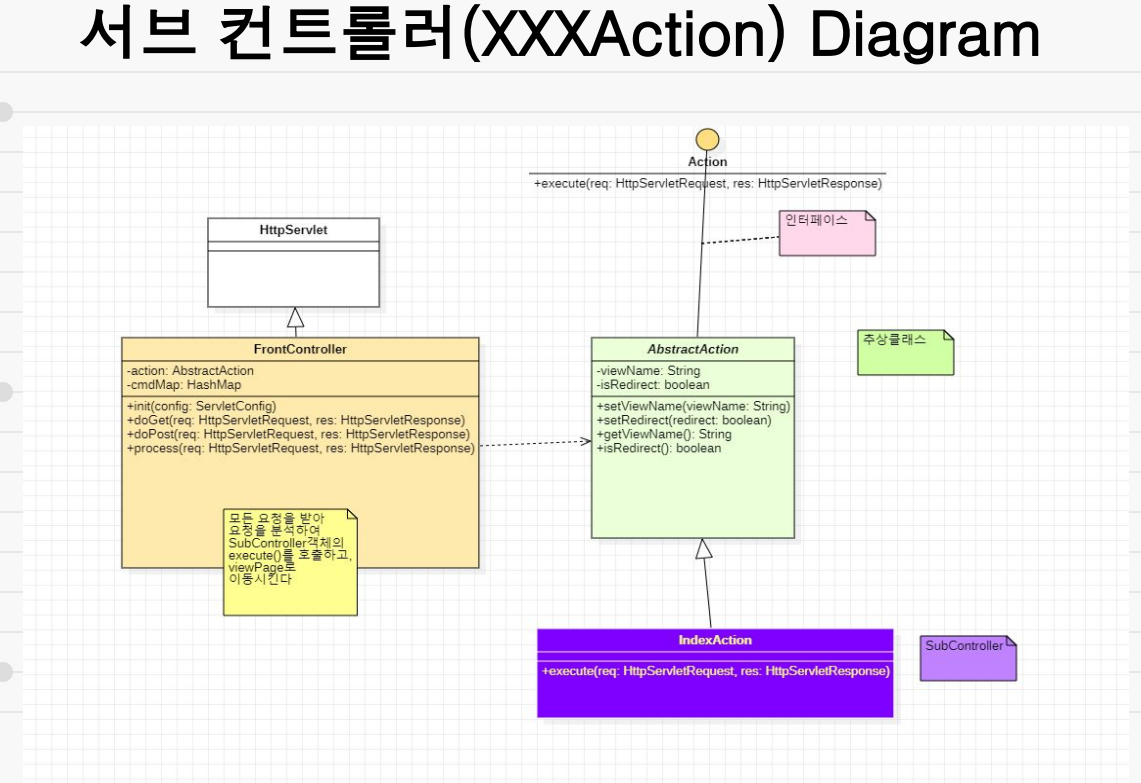
- M: Model ==> DAO, VO, DTO
- V: View ==> .jsp, html ...
- C: Controller
- FrontController (Servlet): 클라이언트의 모든 요청을 접수하는 컨트롤러
요청 URI를 분석해서 필요한 서브 컨트롤러(XXXAction)에게 작업을 위임함
이때 Command.properties 파일에 "요청urlpattern = XXXAction"의 매핑 정보를 참조한다. - SubController (XXXAction 클래스): 실질적으로 비즈니스 로직을 처리하는 일꾼
XXXAction 클래스들은 모두 AbstractAction 추상 클래스를 상속받는다.
- FrontController (Servlet): 클라이언트의 모든 요청을 접수하는 컨트롤러
Front Controller 구현방법
1. URL 패턴 지정
프론트 컨트롤러 패턴을 적용할 URL 패턴의 규칙을 정한다.
예를 들어 다음과 같이 "~.do", "~.action"과 같은 요청패턴을 지정한다.
<a href = "memberInsert.do">회원가입</a>
<a href = "memberSearch.do">회원정보 조회</a>
2. 프론트 컨트롤러(서블릿) 작성
작성하는 프론트 컨트롤은 서블릿 클래스이다. 따라서 프론트 컨트롤러는 HttpServlet을 상속받아 작성한다.
[경로: src/main/java/common.controller/FrontController]
|
1
2
3
4
5
6
7
8
9
10
11
|
package common.controller;
@WebServlet(
urlPatterns = { "*.do" },
initParams = {
@WebInitParam(name = "config",
value = "C:\\multicampus\\Java-workspace\\MyMVC\\src\\main\\webapp\\WEB-INF\\command.properties")
})
public class FrontController extends HttpServlet {
...
}
|
cs |
- urlPatterns = { "*.do" } → 요청패턴을 do로 지정
- @WebInitParam: 로컬 파라미터 정보를 정함 → 서블릿 클래스에서 ServletConfig 객체를 사용하여 추출할 수 있음
- String getInitParameter(String name): 특정 파라미터의 값(<param-value>)을 리턴한다.
- Enumeration getInitParameterNames(): 여러 파라미터 이름을 Enumeration 타입으로 리턴한다.
3. 컨트롤러 인터페이스 작성
컨트롤러 인터페이스는 컨트롤러 기능을 구현하는 메서드를 통일하기 위해 작성한다. 서브 컨트롤러는 이 인터페이스를 구현하게 되고 프론트 컨트롤러에서 모든 서브 컨트롤러를 통일된 방법으로 실행할 수 있다.
[경로: src/main/java/common.controller/Action.java]
|
1
2
3
4
5
6
|
package common.controller;
import javax.servlet.http.*;
public interface Action {
//추상메서드 (앞에 public 자동으로 붙음)
void execute(HttpServletRequest req, HttpServletResponse res) throws Exception;
}
|
cs |
4. 컨트롤러 추상클래스 작성
서브 컨트롤러를 작성하기 전에, 컨트롤러 인터페이스를 구현하면서 서브 컨트롤러가 상속할 수 있게 하는 중간 다리의 역할을 하는 컨트롤러 추상클래스를 작성한다. 이 추상클래스는 멤버 변수로 viewName(보여줄 뷰 페이지)와 isRedirect(boolean값, true면 redirect 방식으로 이동 / false면 forward 방식으로 이동)를 가지고 있다.
또한, 상속으로 인해 컨트롤러 인터페이스의 execute() 추상메서드를 가지고 있으며, viewName과 isRedirect에 대한 setter / getter 메서드를 가지고 있다.
[경로: src/main/java/common.controller/AbstractAction.java]
|
1
2
3
4
5
6
7
8
9
10
11
12
13
14
15
16
17
18
19
20
21
22
23
24
|
package common.controller;
//추상 클래스
public abstract class AbstractAction implements Action{
private String viewName; //보여줄 뷰 페이지 (jsp) 이름
private boolean isRedirect = false;
//true면=> redirect방식으로 이동, false면=> forward방식으로 이동
//상속으로 인해 execute() 추상메서드를 가지고 있음
//setter, getter
public String getViewName() {
return viewName;
}
public void setViewName(String viewName) {
this.viewName = viewName;
}
public boolean isRedirect() {
return isRedirect;
}
public void setRedirect(boolean isRedirect) {
this.isRedirect = isRedirect;
}
}
|
cs |
5. 서브 컨트롤러 작성
서브 컨트롤러는 프론트 컨트롤러 다음에 실제 서비스를 처리하는 컨트롤러를 말하며, 앞에서의 컨트롤러 추상클래스를 상속받는 클래스를 작성한다.
[경로: src/main/java/common.controller/IndexAction.java]
|
1
2
3
4
5
6
7
8
9
10
11
12
13
14
15
16
17
18
19
20
21
22
23
|
package common.controller;
import javax.servlet.http.HttpServletRequest;
import javax.servlet.http.HttpServletResponse;
//SubController(일꾼) => AbstractAction추상클래스를 상속받는다. => execute()메서드를 구현해야 함(override)
//index.do => IndexAction을 찾아서 execute()호출한 뒤 => index.jsp로 forward 이동해서 응답
//매핑 정보는 MyMVC/WEB-INF/command.properties 파일에 저장되어 있다
public class IndexAction extends AbstractAction {
@Override
public void execute(HttpServletRequest req, HttpServletResponse res) throws Exception {
System.out.println("IndexAction의 execute()호출됨...");
req.setAttribute("msg", "MVC패턴으로 홈페이지를 만들어봅시다");
//뷰페이지 지정
this.setViewName("index.jsp");
//이동방식 지정
this.setRedirect(false); //forward방식으로 이동
}
}
|
cs |
request에 값을 저장했기 때문에, redirect방식으로 이동하게 되면 새로운 request를 부르기 때문에 값이 날아간다. forward 방식으로 불러야 저장된 값이 날아가지 않는다.
6. 서브 컨트롤러 연결
프론트 컨트롤러 실행이 완료된 후 서브 컨트롤러가 실행되게 하려면, 프론트 컨트롤러는 어떤 요청에 대하여 어떤 서브 컨트롤러가 실행되어야 하는지에 대한 정보를 알고 있어야 한다. 이러한 정보는 주로 map 객체에 저장하여 저장된 정보에서 서브 컨트롤러를 찾아서 실행한다.
[경로: src/main/java/common.controller/FrontController]
|
1
2
3
4
5
6
7
8
9
10
11
12
13
14
15
16
17
18
19
20
21
22
23
24
25
26
27
28
29
30
31
32
33
34
35
36
37
38
39
40
41
42
43
44
45
46
47
48
49
50
51
52
53
54
55
56
57
58
59
60
61
62
63
64
65
66
67
68
69
70
71
72
73
74
75
76
77
78
79
80
81
82
83
84
85
86
87
88
89
90
91
92
93
94
95
96
97
98
99
100
101
102
103
104
105
106
107
108
109
110
111
|
package common.controller;
/*FrontController : *.do 패턴의 모든 요청을 받아들인다.
* - command.properties 파일에 있는 매핑 정보를 읽어들여 해당 요청uri와 매핑되어 있는
* SubController(XXXAction)을 찾아 객체화 한 뒤 해당 객체의 메소드(execute)를 호출한다.
* - 서브 컨트롤러는 해당 작업을 수행한 뒤에 다시 FrontController로 돌아와 보여줘야 할 View
* 페이지(JSP) 정보를 넘긴다.
* - FrontController는 해당 뷰페이지로 이동시킨다. (forward방식 이동 or redirect방식 이동)
* */
@WebServlet(
urlPatterns = { "*.do" },
initParams = {
@WebInitParam(name = "config",
value = "C:\\multicampus\\Java-workspace\\MyMVC\\src\\main\\webapp\\WEB-INF\\command.properties")
})
public class FrontController extends HttpServlet {
private static final long serialVersionUID = 1L;
private HashMap<String, Object> cmdMap = new HashMap<>();
//command.properties 파일에 있는 값들을 해시맵에 옮긴다.
private AbstractAction action = null;
public void init(ServletConfig conf) throws ServletException {
System.out.println("init()...");
String propsPath = conf.getInitParameter("config"); //경로값이 들어올 것임
System.out.println("propsPath: " + propsPath);
Properties pr = new Properties();
try {
FileInputStream fis = new FileInputStream(propsPath);
pr.load(fis);
System.out.println("pr: " + pr);
if(fis!=null) fis.close();
//System.out.println(pr.getProperty("/index.do"));//클래스명을 문자열로 반환
//pr에서 key값들을 먼저 추출하자
Set<Object> set = pr.keySet();
if(set!=null) {
for(Object key:set) {
String cmd = key.toString(); //"/index.do"
String className = pr.getProperty(cmd); //"common.conroller.IndexAction"
if(className!=null) {
className = className.trim(); //앞 뒤 공백 제거
}
System.out.println(cmd+": " + className);
//className을 실제 객체로 인스턴스화
Class<?> cls = Class.forName(className);
Object cmdInstance = cls.getDeclaredConstructor().newInstance();
//해당 클래스의 객체를 생성해줌
//////////////////////
cmdMap.put(cmd, cmdInstance);
//////////////////////
}
System.out.println("cmdMap저장 완료: cmdMap.size()=>" + cmdMap.size());
}
}catch (Exception e) {
e.printStackTrace();
throw new ServletException(e);
}
}
protected void doGet(HttpServletRequest request, HttpServletResponse response) throws ServletException, IOException {
process(request, response);
}
protected void doPost(HttpServletRequest request, HttpServletResponse response) throws ServletException, IOException {
process(request, response);
}
private void process(HttpServletRequest request, HttpServletResponse response) throws ServletException, IOException{
//클라이언트의 요청 URI를 분석하자
//context명 이후 경로 얻기
String cmd = request.getServletPath();
System.out.println("cmd == " + cmd);
Object instance = cmdMap.get(cmd);
if(instance==null) {
System.out.println("Action이 null");
throw new ServletException("Action이 null입니다");
}
System.out.println("instance==" + instance);
////////////////////////////////////
if(instance instanceof AbstractAction) {
action = (AbstractAction)instance;
}
////////////////////////////////////
try {
action.execute(request, response);
//execute()에서는 로직을 수행한 후
//viewPage를 setting, isRedirect값도 setting
String viewPage = action.getViewName();
boolean isRedirect = action.isRedirect();
if(isRedirect) {
//redirect방식으로 이동
response.sendRedirect(viewPage);
return;
}else {
//forward방식으로 이동
RequestDispatcher disp = request.getRequestDispatcher(viewPage);
disp.forward(request, response);
}
}catch (Exception e) {
e.printStackTrace();
throw new ServletException(e);
}
}
}
|
cs |
[경로: src/main/webapp/WEB-INF/command.properties]
|
1
2
3
|
# comment
# key=value
/index.do=common.controller.IndexAction
|
cs |
